Wednesday, August 5, 2015

Difference Between OnSubjobOk and OnComponentOk

The difference between OnSubjobOk and OnComponentOk lies in the execution order of linked subjob.

With OnSubjobOk, linked subjob starts only when the previous subjob completely finishes.
We should use OnSubJobOk when there are many jobs linked to each other and next subjob should be trigger only once the previous subjob is completed.

We can also use OnSubJobError to send any notification email incase of any job failure which will
help you to identify the job which has failed.

You can also use tDie component with on subjoberror trigger which will kill the process incase of any subjob failure.

With OnComponentOk, linked subjob starts when the previous component finishes.
OnComponentOk

On OnComponentOk trigger next component will trigger once the previous component is finished.

It is very difficult to say where to use both but based on your requirement both can be used.

Tuesday, June 23, 2015

How to use UnpivotRow component in Talend !!

In this post I will show you how to convert columns to multiple rows.  Step by Step post will help you to follow the steps to convert columns to rows in case if you get the input data as per the below
format.


This is Institution Input File:-
Intitution_ID;Intitution_Name;Address;City;Country;Course_1;Course_2;Course_3
101;NIIT;722 Bur Oak Avenue;Berlin;Germany;CS;EE;EC
102;AIIM;11 Collaroy 2093;Medrid;Spain;MBA;BBA;BCA
103;SRIT;223 Wellington 5011;London;UK;BSC;ME;MTECH

There is a specific talend component inbuilt for this purpose which will convert the columns to rows based on the key ID. Just follow the steps and you will be able to achieve your desired output.

Search for the tUnpivotRow component in the pallete area and Drag and drop the following components from the palette tFileInputDelimited,tUnpivotRow, and tLogRow.


Open the component properties of tUnpivotRow .
Click on Edit schema button, columns will be same as in the input file but in tUnpivotRow_1(Output) there will be one pivot key and pivot value column.And we want one more column to appear in output i.e Institution_ID so add it by clicking + button.


In the Row keys field if you want Institution_ID as a key i.e ID should be displayed for all the institutions so add it by clicking on + button.


When you Run the job excluding Institution_ID columns all other columns will be multiplied by 3 rows i.e there will be 3 rows * 7 columns = 21 rows will appear in the output.

Starting job how_to_use_unpivot at 14:41 21/05/2015.

Now after running the job you should be able to see the desired output in the screen as per below format, for the proper view you can choose the "table(print values in cells of a table)" which will print all the rows in proper table format.


[statistics] connecting to socket on port 3454
[statistics] connected
.----------------+--------------------+---------------------------.
|                               tLogRow_1                                       |
|=---------------+--------------------+-------------------------=|
|pivot_key            |pivot_value                |Institution_ID  |
|=-------------------+-------------------------+----------------=|
|Institution_Name|NIIT                            |101                 |
|Address               |722 Bur Oak Avenue  |101                 |
|City                     |Berlin                          |101                 |
|Country               |Germany                     |101                 |
|Course_1             |CS                               |101                 |
|Course_2             |EC                               |101                 |
|Course_3             |EE                               |101                 |
|Institution_Name|AIIM                           |102                 |
|Address               |11 Collaroy  2093       |102                 |
|City                     |Medrid                         |102                |
|Country               |Spain                           |102                |
|Course_1             |MBA                           |102                |
|Course_2             |BBA                            |102                |
|Course_3             |BCA                            |102                |
|Institution_Name|SRIT                            |103                |
|Address               |223 Wellington  5011  |103               |
|City                     |London                         |103               |
|Country               |UK                               |103               |
|Course_1             |BSC                             |103               |
|Course_2             |ME                               |103               |
|Course_3             |MTECH                       |103               |
'---------------------+--------------------------+----------------'
[statistics] disconnected
Job how_to_use_unpivot ended at 14:41 21/05/2015. [exit code=0]

Monday, June 22, 2015

How to convert rows to columns using tPivotToColumnDelimited component in Talend !!

In this post I will show you how to convert rows to columns using tPivotToColumnsDelimited . 
It requires at least three columns in the input schema: the Pivot column, the Aggregation column and one or more Group keys.

This is Institution Input File:-

Intitution_ID;Intitution_Name;Intitution_Address;Intitution_Course;Institution_CourseName
101;IT;722 Bur Oak Avenue  Berlin Germany;Course1;CS
101;IT;722 Bur Oak Avenue  Berlin Germany;Course2;EE
101;IT;722 Bur Oak Avenue  Berlin Germany;Course3;EC
102;AIIM;11 Collaroy  2093 Medrid Spain;Course1;BCOM
102;AIIM;11 Collaroy  2093 Medrid Spain;Course2;BBA
102;AIIM;11 Collaroy  2093 Medrid Spain;Course3;BCA          
103;SRIT;223 Wellington  5011 London UK;Course1;BSC
103;SRIT;223 Wellington  5011 London UK;Course2;ME
103;SRIT;223 Wellington  5011 London UK;Course3;MTECH

Drag and drop the components from the palette and connect each of them as shown in the blow screenshot.

Configurations setting of the tPivotToColumnsDelimited  component :
Pivot Column =”Type”
Aggregation column=”Value”
Aggregation Function =”last”
Group by “ID” and “Name” column.
Rest of the configuration is for output file, where our output will be transferred. to read output file we can use either delimited component but for quick review I`ll use tFileInputFullRow.
Add tFileInputFullRow below the tFixedFlowInput component and connect with “On Sub Job Ok” trigger. and provide previously created file path and rest of the details.
add tLogRow and connect to tFileInputFullRow component and execute the job you will get above out put on console.
Final Job Design.


Open the component properties of tPivotToColumnDelimited.

Pivot Column – In order to convert rows to columns, we need to identify a one column which need to be converted to multiple columns based on Aggregate column. 
In this we want to convert Institution_Course to multiple column so select Institution_Course in Pivot column field.

Aggregate column  - Aggregation column is the column from source data on which aggregation is to be applied with specific function.
Aggregation column is Institution_CourseName here we want aggregate the course name.

Aggregation function – which type of aggregation is to be applied on input data. If no aggregation function is applied, then you can select “First”. Aggregation functions available are Sum, Count, Min, Max, First, Last. Select the Aggregation function first.

Group by – You need to provide a group by column name, this is the column based on which pivot columns are created. Select Institution_ID, Institution_Name, Institution_Address.These columns we want to be grouped by pivot column.

Give the File Name path where you want to store the data.

Open the component properties of tFileInputFullRow.
Provide the File Name path where you want to store the data.

Click on Edit schema button this schema will be shown as below.


In tLogRow component select Table(print value in cells of table) option so that result will appear in table format.

Run the job you will see all the Institution_CourseName are grouped together with Institution_ID, Institution_Name, Institution_Address.
We have 9 rows in input and 3 rows as output .

Starting job how_to_tpivottocolumn at 15:16 21/05/2015.

[statistics] connecting to socket on port 4080
[statistics] connected
.--------------------------------------------------------------------------------------.
|                            tLogRow_1                                                                    |
|=-----------------------------------------------------------------------------------=|
|line                                                                                                             |
|=-----------------------------------------------------------------------------------=|
|101;IT;722 Bur Oak Avenue  Berlin Germany;CS;EE;EC                       |
|102;AIIM;11 Collaroy  2093 Medrid Spain;BCOM  ;BBA;BCA            |
|103;SRIT;223 Wellington  5011 London UK;BSC ;ME;MTECH           |
'--------------------------------------------------------------------------------------'
[statistics] disconnected
Job how_to_tpivottocolumn ended at 15:16 21/05/2015. [exit code=0]

Wednesday, June 17, 2015

How to Combine Excel Workbook together With tUnite Component in Talend !!

In the scenaio we are combining several excel workbook or sheets inside the workbook by using tUnite component .
There are two xlsx files one contain the data of France countries with 2 rows and another file contains the data of Mexico countries with 3 rows .tUnite component will merge both the files and get the data of both the countries with output containing 5 rows.

This job will read both the files from tFileInputExcel.
Combine the files with tUnite component.
tUnite component is used to merge data from various sources, based on a common schema. 
For the tUnite component you need to match the schema.

This is the Excel workbook consisting of different sheets France.xlsx,Mexico.xlsx.


This is France data:--

Customer_ID|Customer_First_Name|Customer_Last_Name|Customer_Address|Customer_City| Customer_PostalCode|Customer_Country|RegisterDate
7|Justin|Ash|90 Ruapehu Road   Ohakune |Strasbourg|67000|France|1/13/2010
9|David|French|Williamstown Road|Marseille|45668|France|3/16/2000

This is Mexico data:--

Customer_ID|Customer_First_Name|Customer_Last_Name|Customer_Address|Customer_City| Customer_PostalCode|Customer_Country|RegisterDate
2|William|Hinkle|543 ANJOU ANJOU H1K 2P4|Mexico|71450|Mexico|10/4/2007
3|Nick|Petrakis|40  Toronto M8Z 3Z7|Mexico|48577|Mexico|3/16/2000
13|George|Loomis|16 Martel   Beloeil|Mexico|43256|Mexico|1/13/2010

Drag and drop the tFileInputExcel ,tUnite and tLogRow component from the palette.
Connect each component as shown in the below screenshot.

Open the component properties of France[tFileInputExcel_1] and Mexico[tFileInputExcel_2].In both tFileInputExcel do the same process.
Tick the box of Read excel 2007 file format.
In the File name/Stream tab provide the path of the file where you have stored the file.
To apply header to each sheet tick the box of Affect each sheet(header&footer).
Tick the checkbox of Die on error so that if there is any error while processing the file then it will stop the job.


Open the component properties of tUnite .
Here provide the same schema of France country .Simply drag and drop the schema.
In the Basic settings view of tLogRow, select the Basic option or tou can select Table option to display properly the output values.

Run the job.
Your output will look like below containing the data of both the countries France and Mexico with total 5 rows.

Starting job tunite at 13:51 17/06/2015.

[statistics] connecting to socket on port 3662
[statistics] connected
Customer_ID Customer_First_Name Customer_Last_Name Customer_Address Customer_City Customer_PostalCode Customer_Country RegisterDate
7|Justin|Ash|90 Ruapehu Road   Ohakune |Strasbourg|67000|France|1/13/2010
9|David|French|Williamstown Road|Marseille|45668|France|3/16/2000
2|William|Hinkle|543 ANJOU ANJOU H1K 2P4|Mexico|71450|Mexico|10/4/2007
3|Nick|Petrakis|40  Toronto M8Z 3Z7|Mexico|48577|Mexico|3/16/2000
13|George|Loomis|16 Martel   Beloeil|Mexico|43256|Mexico|1/13/2010
[statistics] disconnected
Job tunite ended at 13:51 17/06/2015. [exit code=0]

Tuesday, June 16, 2015

How to resolve Memory Error in Talend !

When dealing with large amounts of data, there is often a issue between performance and memory usage, so it is likely that at some point in your Talend career, you will encounter a problem which is memory related.

Increasing the memory allocated to a Job

If you have enough memory and yet your job is failing, then it is worth increasing the amount of memory available to the job you are running. You can do this by changing the value of the Java Xmx setting.

This setting is available via the Advanced Settings option from the Run tab, as shown in the below screenshot. Simply tick the box for Use specific JVM arguments, and change the value to suit your needs.

There are two types of memory allocation :--
-Xms :--When we will use this memory allocation this means that when we get started a job it is using this much memory .
-Xmx:--When we will use this memory allocation this means that the memory is the maximum memory, your job cannot use more than this memory space.


Double click on the argument -Xms256M , this screen will appear change the value and click OK button.Generally we are changing the values of Xmx maximum memory so that our job can use more memory space.

Note that you can also use G for gigabytes, for example, –Xmx3G.

If you are running the jobs in TAC(Talend Administration Control ) you need to assign the JVM parameter if you are going to process large amount of data.

You can also set "Store temp data" to true if you are using huge lookup data file to get the desired output. 

Monday, June 15, 2015

How to get reject data using tFilterRow in Talend !!

In a given scenario there is a Customer data belonging to different country we have to put each customer data with there country in different excel sheets and in one excel sheet with sub sheets.

This is Customers Data Input File:--
Customer_ID,Customer_First_Name,Customer_Last_Name,Customer_Address,Customer_City,Customer_PostalCode,Customer_Country,RegisterDate

1,Lee,Sime,722 Bur Oak Avenue ,Berlin,12232,Germany,1/13/2010
2,William,Hinkle,543 ANJOU ANJOU H1K 2P4,Mexico,71450,Mexico,10/4/2007
3,Nick,Petrakis,40  Toronto M8Z 3Z7,Mexico,48577,Mexico,3/16/2000
4,Jian,Paysnoe,11 Collaroy  2093,London,56008,UK,1/13/2010
5,Min,Parks,223 Wellington  5011,Berlin,32456,Germany,10/4/2007
6,Joseph,guo,324 Tman Street   Stafford Heights ,Mannheim,43567,Germany,3/16/2000
7,Justin,Ash,90 Ruapehu Road   Ohakune ,Strasbourg,67000,France,1/13/2010
8,Ming,Ho,32 Wilfred road,Madrid,33456,Spain,10/4/2007
9,David,French,Williamstown Road,Marseille,45668,France,3/16/2000
10,GORDON,baleri,East 7th Avenue   Vancouver Vancouver,Tsawassen,98977,Canada,1/13/2010
11,Aaron,Vanzin,431 algary Calgary ,London,56785,UK,10/4/2007
12,Gregory,wang,29 View Royal Ave   Victoria Victoria,Buenos Aires,54367,Argentina,3/16/2000
13,George,Loomis,16 Martel   Beloeil,Mexico,43256,Mexico,1/13/2010
14,JACOB,Jiang,13 Surrey Close,Bern,35843,Switzerland,10/4/2007

Sync Columns to propogate the metadata.

  • In the Conditions table, fill the filtering parameters.
  • In InputColumn, select Customer_Country, Function as Empty,Operator as Equals.
  • Or you can select other options from dropdown list such as greater than,lower based on your requirement in Operator field.


  • In the Value column, type "UK" to filter .

Open the component properties of UK(tFileOutputExcel).
Tick the check box of Write excel2007 file format and Include header.
In the File Name tab provide the path where you want to store the data of UK country.

And do the same process for other countries also.

Here in tFilterRow_4 we are taking three countries Germany Spain and Canada together so here we will use option Use advanced mode then click check box and type in the following regular expression that includes Country to be searched---

input_row.Customer_Country.equals("Germany") ||
input_row.Customer_Country.equals("Spain") || 
input_row.Customer_Country.equals("Canada")


Click on the tFileList component properties and then click on “Directory” tab select the directory that contains the excel files by clicking on the “…” button.For example I have all four files in one folder named as customer_reject so provide the path of this folder.

In the "Files" column write the Filemask such as "U*" , "Fran*","Mexico*","Germany*" this means that the filename which starts from this words that files will be only considered in tFileList .

Open the tFileInputEcxel_1 component properties and set Property type  to “Built In”.
Under “File name / Stream” tab type 
((String)globalMap.get("tFileList_1_CURRENT_FILEPATH"))
Or you can type tfilelist then press ctrl + space.
Then select this option tFileList_1.CURRENT_FILEPATH.


Open tmap properties here input column with output column auto map is done each input column is connected to its output column.Click ok button.

Open the tFileInputEcxel_3 component properties and set Property type  to “Built In”.
Give the File Name path where you want to store all the countries together in excel sheet with sub sheets for eg, I have given the folder name country_all.

Under “Sheet Name” tab type 
StringHandling.EREPLACE(((String)globalMap.get("tFileList_1_CURRENT_FILE")),".xlsx","")

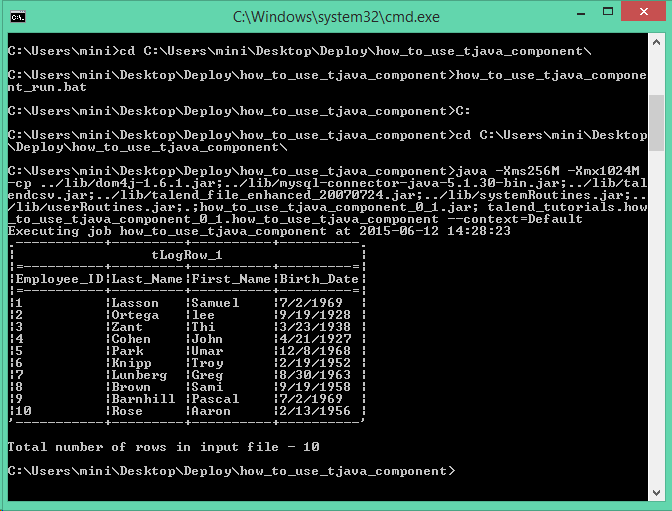
When you will Run the job firstly each country will be in your directory path and then from there tfilelist component will check eack country and will output each countries in one excel sheets named Country_all with sub countries.As you can see in screenshot below country_all.xlsx there are sub sheets named as France ,GermanySpainCanada ,Mexico,UK.


Friday, June 12, 2015

How to do Deploying and Scheduling in Talend !!

This post will help you to schedule the Talend jobs in case if you are not using Enterprise edition of Talend, because  enterprise Talend comes with TAC (Talend Administration Center) where you can schedule the job easily.

Below steps are to schedule the job if you using Open Source Talend. To schedule the job follow the below steps and at the end of this post you should be able to schedule the talend job.

1.Right-click on the job and select the option Build Job.


2.Click on Browse to navigate to the folder .

3.Ensure the Export type is Autonomous Job, and tick Extract the zip file.

4. In the options tick Shell launcher and Context Scripts.

The Shell launchers option allows you to specify if you want to create shell launch scripts. These are Unix and Windows style scripts for launching your Job. You may choose the style of scripts that you want to export.

If you select the Context scripts option, then Talend will export scripts for each of the Context that you have defined in your Job.
.
5. Click on Finish to compile the job.


6.Navigate to the compiledCode folder, and you will see a zip file and a directory for the compiled job.

Executing the job

Open a command window within Windows or a shell window in Unix.
.bat is for windows and .sh is for UNIXHere I am executing the job in windows.

Enter the command “<jobName>_run.bat”. The job shown here is how_to_use_tjava_component, thus  how_to_use_tjava_component_run.bat.


Now if you want to Schedule your Talend job daily ,weakly etc.Follow the Steps:--
Go to the Control Panel Settings in your system under Administrative Tools > Task Scheduler.

Click Create Basic Task on right side of screen.

 Write the Name and Description of the task.

 Then select how often you want to run your task . Then click Next button.

 Above you have selected daily option so task will occur every day.

 Select Start a program in Action Field.Click on Next button.

 Browse to the location of the batch file.Click on Next button.

 Here the Summary of your task is shown.Click on Finish button.

Tuesday, June 2, 2015

How to Download Files From FTP Server Using Talend !!

In this post I will show you how to extract files or get files from FTP server using Talend.
In the given scenario we assume that we don’t know the exact names of the files to be downloaded from the remote location and we just know the extensions type and the path of the incoming files .

As an ETL developer we know most of the time data comes in multiple format through FTP and we need to process the data to keep the business running. In this post will try to give an idea how we can process the data to achieve our desired data. I will be showing how to get the file from FTP and UnArchive the file. Once Archived file is available you can push that data into the database as per you required business rules.

Drag and drop the following component from the palette :-
tFTPConnection , tFTPGet , tFileList , tFileUnarchive.
Connect each component as shown in the screenshot below.


tFTPConnection creates a connection to your FTP server.
Open the component properties of tFTPConnection and fill the Host name , Port , Username and Password field.


You can also create the FTP connection under MetaData repository

Open the component properties of tFileGet and fill the Local Directory path where you want to copy the files and remember it should always be in double quotes "".
And fill the path of incoming files in the Remote Directory .
In the Files list using Filemask specify all the types of files you want to retrieve from the remote server by clicking + button.


In the tFileList component fill the Directory path and Filemask of the files same as you gave in the tFileGet component local directory path and filemask.


Now tFileList component is connected with Iterate link to tFileUnarchive component so that all the files one by one get archive.

Open the component properties of tFileUnarchive.
In the Archive File field provide the path of the tFileList.
((String)globalMap.get("tFileList_1_CURRENT_FILEPATH"))

Or you can press ctrl + space key and select tFileList_1_CURRENT_FILEPATH.


Atlast when you Run the job all the files get retrieved in your local directory which you have given with mentioned extensions.

Friday, May 29, 2015

How to Execute multiple SQL queries using tMysqlRow component in Talend !!

In this post I will show you how to execute multiple SQL queries using tMysqlRow component.

Drag and drop the following components from the palette tMysqlConnection , tMysqlRow , tMysqlCommit.

How to do connect each component:--

Right click on tMysqlConnection and select Trigger > OnSubjobOk and drag a line o the tMysqlRow component .
Right click on tMysqlRow and select Trigger > OnSubjobOk and drag a line o the tMysqlCommit component .

Open the component properties of tMysqlConnection .

We have to set the additional JDBC parameters to allow multiple queries to be executed. 
To do this enter "allowMultiQueries=true" in the Additional JDBC parameters text box on the tMySQLConnection component.


Open the component properties of tMysqlRow .
Enter the multiple SQL queries separated by semicolon “;” in the Query text box
In this I have created a table with columns and insert a value in the column.
Don't forget to put " " at the starting of the query and ending of the query.

"Create table MysqlRow_demo
(Emp_ID int,
Emp_FirstName varchar(10),
Emp_LastName varchar(10),
Emp_Address varchar(20),
Emp_City varchar(10),
Emp_Pincode int);

INSERT INTO MysqlRow_demo VALUES(101,'John','Kumar','KR Puram','bangalore',569830);
INSERT INTO MysqlRow_demo VALUES(102,'Bren','Mahlotra','Mallesharam','Gujrat',672395);
INSERT INTO MysqlRow_demo VALUES(103,'Krishna','Tomar','Jayanagar','Pune',492365);"


At last Run the job you will see that table has been created in the database .


Wednesday, May 20, 2015

How to Activate and Deactivate Components and Subjobs in Talend !!

In this post I will show you how to Activate and Deactivate a single component as well as linked components and all the subjobs because sometimes we need to run some specific subjob by disabling the remaining components or sub jobs.
This will save you development time if you are going to test anything before deploying into the production.

Below is just an example how to enable or disable the components  or sub jobs.


If you want to dectivate a single component then right click on tFileList component and select Deactivate tFileList_1 . In this way you can deactivate any component in the job .

When a component or a subjob is deactivated, you are not able to create or modify links from or to it. at At runtime, no code is generated for the deactivated component or subjob.

In this way tFileList component is disable now we want to activate the component back then right click on it and select Activate tFileList_1. Component will become active.

You can also activate or deactivate the subjobs linked to a Start component. 
Here both the component tFileList and tFileInputDelimited are deactivated now if you want to activate both the components.So right click on tFileList and select Activate all linked Subjobs.
The component linked to tFileList will become active.


Here you can see both tFileList and tFileInputDelimited become active.
Now if you want to deactivate the whole job then right click on any component and click Deactivate the current Subjob.
 It will deactivate the whole subjob as shown in the screen.


Now if you want to activate the whole subjob then right click on any component and click Activate current Subjob.
All the component of the subjob get activated.


How to Import and Export Job in Talend !!


In this post will see how to import or export the jobs from talend studio, this will help if you want to share the job with someone else in your team or you want to take the backup and restore into some other Talend Studio project.

Below are the steps to do so.

How to Import Items or Import Jobs :-


When you want to import items or jobs of whole project follow the steps as shown below.

1. Go to the Repository Panel right click on Job Design and click Import items.

If you want to import any specific job then choose that job and right click and click on Import option.

2. In Select root directory field, browse to the directory where you want to import your Job.
Or if you want to Select archive file define the archive file for all selected items.
All the items which you want to import will be seen in the screen and click Finish button.


You can see see in your left side of Repository Panel under Job Design that your selected items are imported.

How to Export Items or Export Jobs 

When you want to export items or jobs of whole project in your directory then follow the steps as shown below.

1. Go to the Repository Panel right click on Job Design and click Export items.

2. In Select root directory field, browse to the directory where you want to store your exported Job.
Or if you want to Select archive file define the archive file where to compress the files for all selected items.


3. Click on Export Dependencies checkbox here all the items such as File Delimited ,Connections,Context,Routines which are part of these jobs will be selected along with these jobs.It will set and export all the dependencies along with Jobs you are exporting.

Exporting items from the Job Design means it will export all the jobs that are selected as shown in the screen we can deselect the job which we don't want.

4. Then click on Finish Button.

Now the other way by which you can Export item.
Here if you want to Export items of single job in your specified directory. 

1. Go to the Repository Panel right click on the Job which you want to export and click Export items.

2.Then browse the Select root directory and provide the path were your want your job to be exported.See in the below screen your job has been selected then click on Export Dependencies option so that all the items related to job are also exported in the directory.


3.Click on Finish button.
Now you can go to your directory and see your job has been exported.

Tuesday, May 19, 2015

How to Manage Version in Talend !!

When you create a Job in Talend Open Studio, by default its version is 0.1 where 0 stands for the major version and 1 for the minor version.

Management of versions in Talend can be done in so many ways.

Firstly close your Job if it is open on the design workspace. If it is open its properties will be read-only and we cannot modify it.
Go to the Repository Panel select your job right click on it and select Open another version option.

This pop window will be seen here tick the checkbox of Create new version and open now you can see that by default the version of the job is 0.1

Click on M button next to Version field the version will be 1.0
Here M is to increment the major version.


Click on button next to Version field the version will be 1.1
Here m is to increment the minor version.

Click which version you want either M or m.
Click the M button to increment the major version and the m button to increment the minor version.Click Finish to validate the modification.


This is the second way by this process also you can manage your version.

Go to the Repository Panel select your job right click on it and select Edit properties option.

Here in this window you can click either M or m button next to Version field to mange version in the job and click Finish button.

This is the third way by this process also you can manage your version.

You can also manage the version of each job together or one by one.

Go to the left side of the window and Open File option then select Edit Project properties.

Expand the General Setting click on Version Management .
By clicking on Job Design checkbox all the job will be selected .The selected items display in the Items list to the right along with their current version in the Version column and the new version set in the New Version column. 


If you want to make changes then:--
In the Options area, select Change all items to a fixed version check box to change the version of the selected jobs in the Items tab to the same fixed version.Click either M or m to manage the job version .By clicking Revert option you can undo the changes.
By clicking on Select all dependencies  you can update all of the items dependent on the selected job.By clicking on Select all subjobs you can update all of the subjobs dependent on the job at the same time.
By selecingt Update the version of each item check box you can increment each version of the jobs and change them manually.Then click on OK button.


Tuesday, May 12, 2015

How to use tRowGenerator component in Talend for generating random sample data !!

tRowGenerator generates as many rows and fields as needed and feeds each field with a random value.

Drag and drop the tRowGenerator and tLogRow component from palette to job design.
Then connect tRowGenerator by right clicking on it and select Row > Main and drag a line to tLogRow component.


Open the component properties of  tRowGenerator by double clicking on it.
The tRowGenerator Editor opens on a separate window consist of two parts:
  • Schema definition panel at the top of the window
  • Function definition and preview panel at the bottom of the window.
  • Click on [+] sign to add new column.
  • Set the Type of each columns.
  • Select function from “Function” tab on same columns grid by dropdown list or in the Function area, you can select the predefined routine/function if one of them corresponds to your needs.
  • To the change the values of Environment variables in the Schema definition panel in order to customize the function parameters.
    • Select the Function parameters tab in the second part of the window.
    • The Parameter area displays Customized parameter as function name there is no edit option.
    • In the Value area, type the value you want or by clicking ... button it open Expression Builder for editing you can add your custom logic.
    • Click on the Preview Button on the left side of upper part of the window.It will dispaly the details of only one Customer.
    • Set the “Number of Rows for RowGenerator” field to be 10. You can generate as many rows you want.

Now Click on Preview tab you can see that 10 rows are generated randomly.


Open the component properties of  tLogRow by double clicking on it and select option Table(print values in cell of a table). tLogRow displays the flow content on run job console.

Atlast Run the job.

You will see the below result all the data of Customer is generated randomly.

Starting job how_to_use_tRowGenerator_component at 14:43 12/05/2015.

[statistics] connecting to socket on port 3545
[statistics] connected
.----------+-------------------+-----------------+----------------+------------+-------------------+---------------|.
|                                        tLogRow_1                                                                                                   |
|=--------+-------------------+------------------+----------------+------------+-------------------+---------------|
|Cust_ID|Cust_FirstName|Cust_LastName|Cust_Address|Cust_City |Cust_PostalCode|RegisterDate|
|=--------+-------------------+------------------+----------------+------------+-------------------+---------------|
|1           |Woodrow           |Quincy              |4M9zwf         |Providence|691078               |20-02-2015  |
|2           |James                 |Harrison            |agcBva          |Sacramento|453808               |03-10-2013  |
|3           |Lyndon              |Quincy               |7olxAs          |Salem         |593135               |17-10-2014  |
|4           |Herbert              |Madison             |wi2TaM        |Lincoln       |466341              |28-12-2014  |
|5           |Herbert              |Harrison             |mInNN7        |Saint Paul   |477362              |29-03-2014  |
|6           |Harry                 |Taft                    |nT7CIC         |Honolulu     |701503             |08-12-2014  |
|7           |Andrew             |Buchanan           |a9IfVO          |Concord      |457610             |18-10-2013  |
|8           |Ulysses              |Johnson             |H9DlnY         |Harrisburg  |590078              |26-06-2013  |
|9           |John                   |Adams               |I4asX8           |Annapolis   |753132              |12-03-2014  |
|10         |Grover               |Taft                    |z4m4zH         |Pierre          |713152              |18-09-2014  |
'---------+-------------------+-------------------+----------------+-------------+-------------------+---------------|

[statistics] disconnected
Job how_to_use_tRowGenerator_component ended at 14:43 12/05/2015. [exit code=0]